|
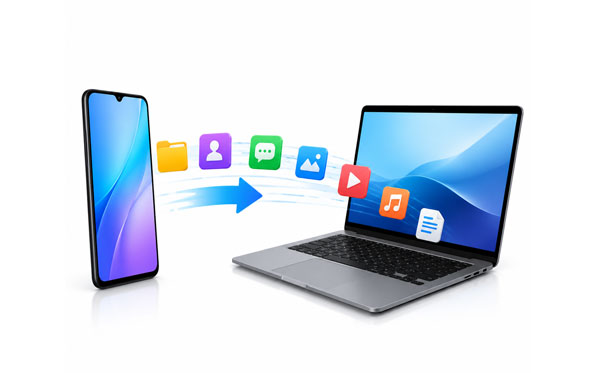
TL;DR: This comprehensive guide covers five efficient ways to seamlessly move files from your Vivo phone to a computer, depending on your preferred connection type.
|
Data transfer between your Vivo phone and your computer doesn't have to be a frustrating chore. Whether you are backing up precious photos, clearing up storage space, or moving work documents, there are several reliable ways to get the job done. This guide will show you how to transfer data from Vivo to PC using five distinct, effective methods, whether you prefer a wired connection or wireless convenience.
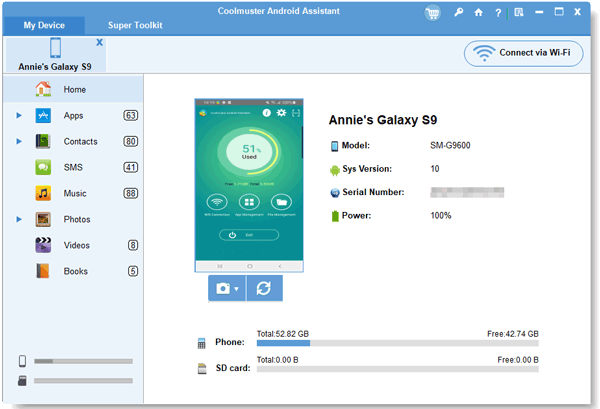
If you are looking for a dedicated, all-in-one desktop tool to manage your Vivo phone's data, this Vivo PC suite tool - Samsung Messages Backup - is a strong choice. It allows you to selectively view, back up, and organize almost all data types, including contacts, SMS, call logs, photos, music, apps, and more directly from your computer screen.
- Let you preview, select, and transfer specific files - contacts, SMS, photos, videos, and other data - from your Vivo phone to your computer.
- Back up your entire Vivo device to your PC in a single click and restore backups without overwriting existing data.
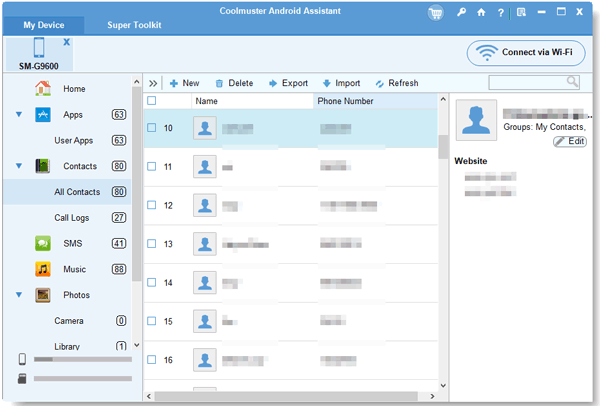
- Allow you to edit, add, group, and delete contacts directly from your computer.
- Support sending and receiving text messages straight from your PC or Mac.
- Keep the original quality of your photos, videos, and music intact during every transfer.
- Work with most Android OS versions like Android 17, and a wide range of brands, including Vivo, OPPO, Samsung, Xiaomi, Motorola, Tecno, Honor, and more.
Download Vivo data manager on your computer.


Step 1: Install this Android data management software on your PC, then launch the it, and connect your Vivo device to the PC. You can choose the Wi-Fi or USB connection.
Step 2: Ensure USB Debugging is enabled in your Vivo's developer options so the software can recognize the device. Once connected, the software will display your phone's data organized by tabs on the left sidebar. Click on the category you want to transfer.
Step 3: Preview and check the boxes next to the specific files you want to move, then click the "Export" button at the top to save them onto your computer.
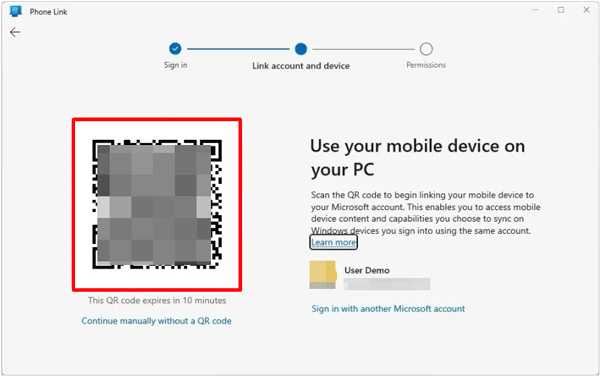
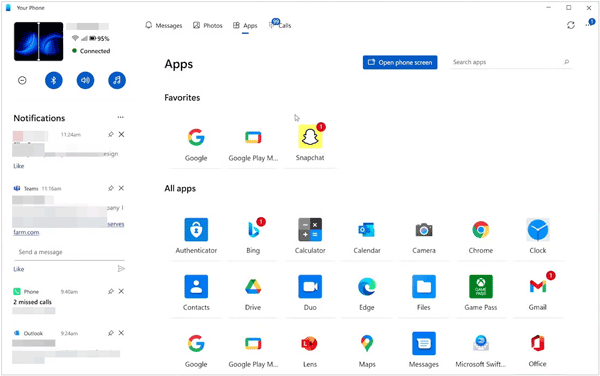
Microsoft's native Phone Link app (formerly Your Phone) bridges the gap between Windows and Vivo Android wirelessly. It is highly convenient if you want instant access to your recent photos, text messages, and mobile notifications right on your PC layout.
Step 1: Type "Phone Link" in your Windows search bar and open the application. Select "Android" as your device type.
Step 2: Download the Link to Windows app from the Google Play Store on your Vivo phone if it isn't pre-installed. Open it and tap "Link your phone and PC".
Step 3: Scan the QR code displayed on your PC screen using your Vivo phone's camera to establish a secure wireless pairing.
Step 4: Go to the "Photos" tab within the PC app, right-click any image you want to save, and select Save as, or simply drag and drop files from the app window onto your desktop.
Google's Quick Share (which integrated and replaced Nearby Share) brings an AirDrop-like wireless experience to the Windows platform. It uses a combination of Bluetooth and peer-to-peer Wi-Fi for swift, close-range wireless transfers without using internet data.
Step 1: Download, install, and open the Quick Share for Windows application on your computer. Ensure your PC's Wi-Fi and Bluetooth are turned on.
Step 2: Set your PC's Quick Share visibility to "Receive from everyone" or "Receive from contacts" so your Vivo phone can see it.
Step 3: Open the File Manager or Gallery app on your Vivo phone, select the items you wish to transfer, and tap the "Share" button. Choose "Quick Share".
Step 4: Tap your PC's name from the list of available nearby devices on your phone. On your computer screen, click "Accept" to authorize the incoming wireless file transfer.

For large video files or bulk backups of media files from Vivo to a PC, nothing beats the raw reliability of a direct hardware connection. It requires zero third-party software installations and relies completely on the built-in Windows File Explorer.
Step 1: Connect your Vivo phone to a vacant USB port on your computer using a reliable USB data cable.
Step 2: Unlock your Vivo phone screen, swipe down from the top to open the notification panel, tap the USB settings notification, and change it from "Charging only" to "File transfer" or "MTP".
![]()
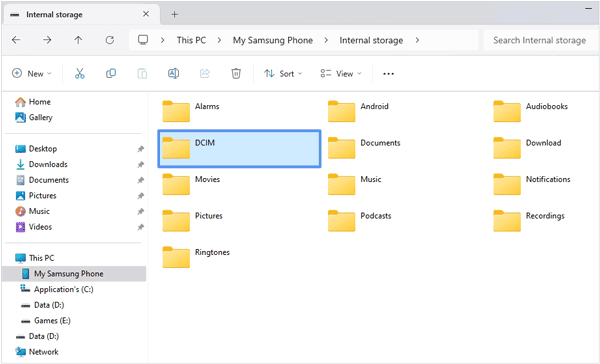
Step 3: Open "This PC" or "File Explorer" on your computer. Double-click your Vivo device under the "Devices and drives" section.
Step 4: Navigate through the internal storage folders (like DCIM for camera photos or Download for saved documents). Copy (Ctrl + C) the folders you need and paste (Ctrl + V) them into a folder on your PC.
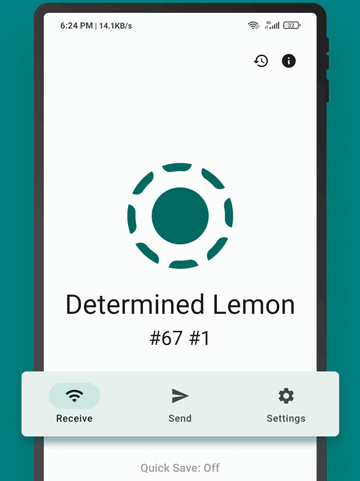
LocalSend is a popular, open-source, and privacy-focused alternative for cross-platform sharing. It operates entirely over your local Wi-Fi network, meaning your data never touches an external cloud server, and it works flawlessly between Android, Windows, Mac, and Linux.
Step 1: Make sure both your Vivo phone and your computer are connected to the exact same home or office Wi-Fi network.
Step 2: Launch the LocalSend app on your Vivo phone and the companion LocalSend desktop app on your laptop. Both devices will be assigned quirky temporary nicknames.
Step 3: In the mobile app, go to the "Send" tab, tap "File" or "Media", and select the data you want to move.
Step 4: Tap your laptop's unique nickname from the list of available local devices. Switch to your laptop and click "Accept" to download the incoming files over Wi-Fi.
Q1: Why is my Vivo phone not connecting to PC via USB cable?
This is usually caused by an incorrect connection mode or driver issues. First, ensure your phone is set to File Transfer (MTP) mode instead of "No Data Transfer" when plugged in. If it still fails, try a different USB cable or USB port (preferably on the back of a desktop PC). Lastly, updating your Windows MTP drivers via the Device Manager can quickly fix unresolved connection bugs.
Q2: Can I transfer contacts and messages directly?
Yes, but standard Windows File Explorer cannot read encrypted database files directly from your phone. To move them, you should use local sync tools like Microsoft Phone Link for real-time viewing, professional Android data managers (as detailed in Part 1), or simply sync them to your Google Account and access them via a web browser on your PC.
Q3: Why are some photos and videos missing after the transfer?
This usually happens because certain media files are backed up or stored on cloud services (like Google Photos or Vivo Cloud) and aren't fully downloaded to your device's physical storage. Another common culprit is app-specific directory structuring - images saved from apps like WhatsApp or WeChat live in separate application subfolders rather than the primary DCIM/Camera folder.
Mobile data doesn't have to be restrictive, and there are several solid ways to transfer data from Vivo to PC depending on what you need. If you prefer deep backup controls, dedicated managers like Samsung Messages Backup offer precise management. This tool offers USB and wireless transfer methods, and supports selective and one-click transfer modes. Also, other methods are useful. Pick the tool that best matches your workflow and keep your files securely backed up.
Related Articles
iPhone to Vivo Data Transfer Guide: Swiftly Transfer Data from iPhone to Vivo
Vivo to Vivo Data Transfer Guide with 5 Effective Solutions
How to Transfer Contacts from Android to Computer [Master Data Movement]
How to Transfer Text Messages from Android to Computer (Hassle Free)

Charlotte Smith, an accomplished editor in the dynamic landscape of mobile technology, has distinguished herself with her abundant experience and skills for iPhone, OnePlus, Sony, Vivo, Motorola, ZTE, Huawei, etc. Help readers and users solve the problems in iPhone Transfer and Mobile Data Management. Her proficiency extends beyond mere functionality, delving into the nuances of each brand with precision and clarity.
Copyright © samsung-messages-backup.com All Rights Reserved.


