"Hi everyone, I am new to Mac, and I want to transfer my videos from iPhone to Mac. Any fast and easy way to transfer photos from iPhone to Mac?"
Many iPhone users use a Mac computer at the same time, so it becomes a common task to transfer videos from iPhone to Mac. Maybe you want to move your videos for freeing up storage, editing on a larger screen, or keeping a backup of your memories. No matter what the reason is, you can now transfer your iPhone videos to Mac with 6 solutions.
The iPhone Data Manager software will be the best way to transfer videos from iPhone to Mac or PC, especially when you plan to move many videos at once. This tool can swiftly load your iPhone video files, and display the video information on the interface, so you can easily select and transfer your desired videos to Mac. Furthermore, it supports the transfer of your iPhone photos, music, contacts, SMS, and more.
- Upload videos from an iPhone to Mac via USB.
- Allow you to preview and select your videos before transferring them to Mac.
- Transfer your videos with their original formats and quality.
- Also transfer other media files like music, documents, pictures, etc.
- Back up iPhone contacts and text messages to a computer.
- Support iOS 5.0 and later, including iOS 26.
Download iPhone Data Manager.


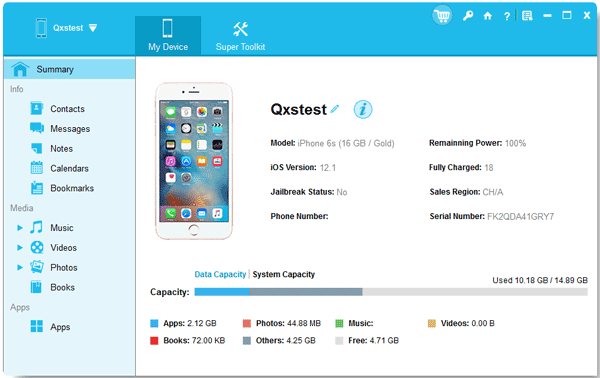
Step 1: Install and launch the iPhone Data Manager program on your Mac device, and then connect your iPhone to Mac with a USB cable.
Step 2: Unlock your iPhone and click "Trust" to make it trust your computer. Once done, the connection will be established.
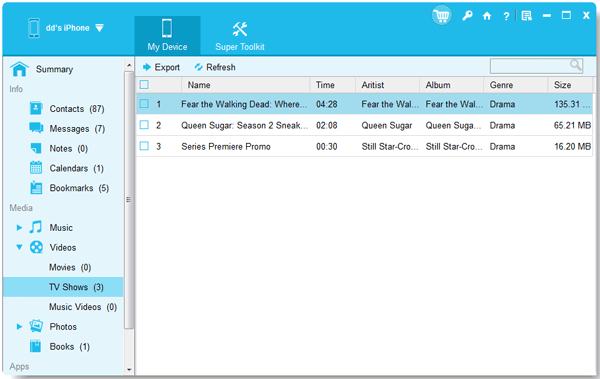
Step 3: Choose "Videos" on the panel, and then click "Movies", "TV Shows", or "Music Videos". Next, select the videos you want on the interface, and click "Export" to transfer them to your Mac.
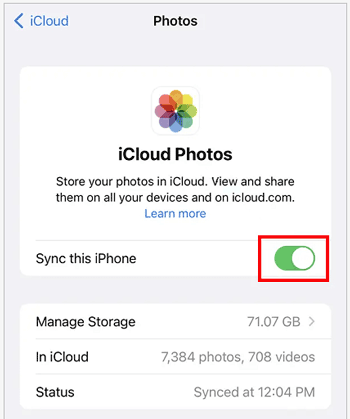
iCloud Photos offers a seamless way to keep your entire photo and video library updated across all your Apple devices. Once enabled, your videos will automatically sync to your Mac when connected to Wi-Fi.
Step 1: Go to Settings > "[Your Name]" > "iCloud" > "Photos" and toggle on "Sync this iPhone". Choose "Optimize iPhone Storage" or "Download and Keep Originals" based on your preference.
Step 2: Open the Photos app on your Mac. Go to "Photos" > "Settings" or "Preferences" > "iCloud" and check "Sync this Mac".
Step 3: Your videos will begin to sync to your Mac. You can choose to download original versions or optimized versions in the Photos settings. Be aware that this process can take some time depending on the size of your video library and your internet speed.
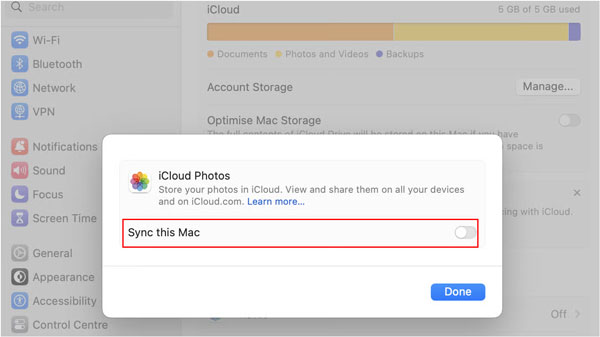
Image Capture is a built-in macOS utility that allows you to import photos and videos directly from your camera or iOS device to your Mac. It's a straightforward option if you prefer not to use iCloud or third-party apps.
Step 1: Connect your iPhone to your Mac using a USB cable. Then open "Image Capture" from your "Applications" folder or by searching with "Spotlight".
Step 2: Your iPhone should appear in the "Devices" list on the left sidebar. Select it.
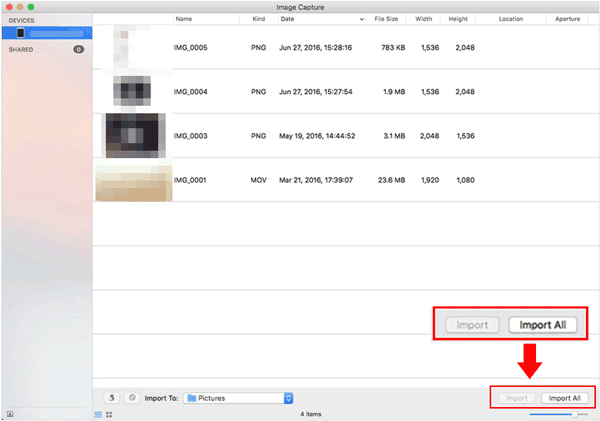
Step 3: Select the videos you want to import. You can choose a destination folder on your Mac from the "Import To" dropdown menu. Click "Import" for selected videos or "Import All" to transfer everything.
AirDrop provides a quick and convenient wireless method for transferring videos between your iPhone and Mac, especially for a few short clips. If you want to send large videos, don't use AirDrop because it's time-consuming.
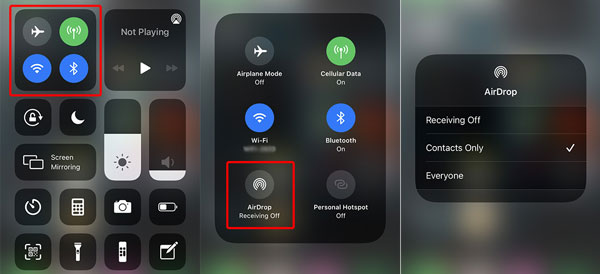
Step 1: Swipe up from the bottom of the screen (or down from the top-right on newer iPhones) to open "Control Center". Tap and hold the network settings card, then tap "AirDrop" and choose "Contacts Only" or "Everyone".
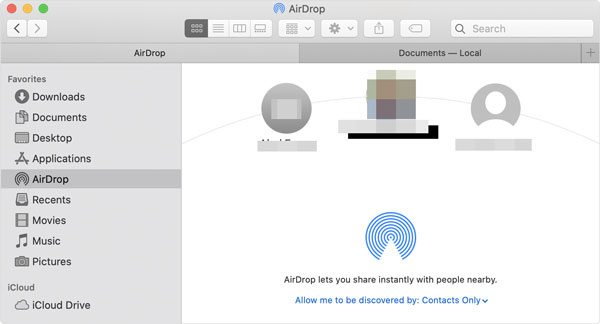
Step 2: Open Finder, click "AirDrop" in the sidebar, and set "Allow to be discovered by" to "Contacts Only" or "Everyone".
Step 3: On your iPhone, open the Photos app, select the videos you want to transfer, and tap the "Share" icon. Next, tap "AirDrop" and select your Mac from the list of nearby devices.
Step 4: A notification will appear on your Mac asking if you want to accept the incoming files. Click "Accept". The videos will be saved to your Mac's "Downloads" folder.
Cloud storage services like Google Drive offer a versatile way to transfer videos, especially if you need to access them from multiple devices or share them with others.
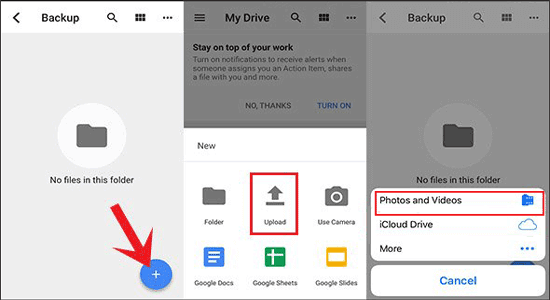
Step 1: Download and install the Google Drive app from the App Store on your iPhone. Then sign in with your Google Account.
Step 2: Tap the "+" icon, and then tap "Upload", Select "Photos and Videos" and choose the videos you want to upload.
Step 3: On your Mac, open a web browser, go to drive.google.com, and sign in with the same Google Account. Locate the uploaded videos, select them, and click the "Download" icon.
For macOS Catalina and later, Finder has replaced iTunes for managing your iOS devices. This method provides a reliable wired connection for transferring your videos.
Step 1: Connect your iPhone to your Mac using a USB cable. Then open a new Finder window on your Mac.
Step 2: Your iPhone will appear in the sidebar under "Locations". Click on it.
Step 3: If this is your first time connecting, you might need to tap "Trust This Computer" on your iPhone and enter your passcode.
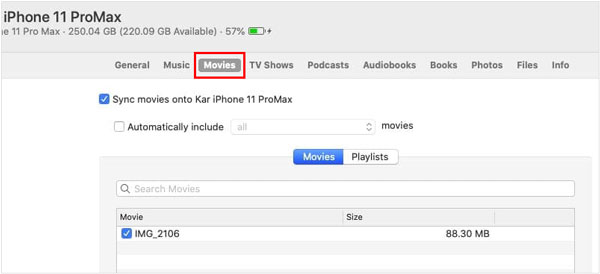
Step 4: Select your iPhone device, and navigate to the "Movies" tab (or "Photos" if your videos are saved as photos.
Step 5: Choose to sync all movies or select the specific ones to transfer. Finally, click "Apply" to start the process.
Q1: Why are my videos not importing from my iPhone to my Mac?
If your videos are not importing from your iPhone to your Mac, there could be several potential reasons. You can fix it with the following methods:
Q2: Why can't I see my videos in the Photos app?
Q3: Which video formats are supported when transferring?
iPhones typically use .MOV or .HEVC (.H.265). macOS supports both, but older Macs may struggle with HEVC.
With these diverse methods at your disposal, you can choose the best way to transfer your videos from your iPhone to your Mac, ensuring your memories are safely stored and accessible. When you need to transfer lots of video files stably, please consider iPhone Data Manager, which can help you export your videos effortlessly.
Simply put, consider the volume of videos, your internet speed, and your preference for wired or wireless transfer when making your choice.
Related Articles
Get iPhone Text Messages on Windows 10 or 11 with 4 Methods (Solved)
Ultimate Manual: How to Sync iPhone to iPhone Like a Pro
How to Copy Videos from iPhone to iPhone with These Expert Tips
Easily Fix Data Transfer Directly from iPhone Not Working (No Hurdle)

Charlotte Smith, an accomplished editor in the dynamic landscape of mobile technology, has distinguished herself with her abundant experience and skills for iPhone, OnePlus, Sony, Vivo, Motorola, ZTE, Huawei, etc. Help readers and users solve the problems in iPhone Transfer and Mobile Data Management. Her proficiency extends beyond mere functionality, delving into the nuances of each brand with precision and clarity.
Copyright © samsung-messages-backup.com All Rights Reserved.


