When a large number of photos take up most of your Samsung phone's storage space, your phone's performance may slow down. Maybe you're not trying to free up storage space but preparing to sell your old Galaxy phone. Either way, it's best to know how to effectively delete photos from your Samsung phone. We've prepared 4 reliable and useful methods for you to choose from based on your specific needs.
When you want to delete photos, in general, you can make it with the Samsung Gallery app directly. However, you cannot permanently delete your photos in one go because the Samsung Gallery has a trash can feature that saves your deleted photos for 30 days. If you want to remove your photos completely, don't forget to empty the trash bin.
Step 1: Open the Gallery app on your Samsung phone, and click the "Pictures" or "Albums" tab.
Step 2: Locate the photos you want to delete, and tap and hold one picture. Then select all useless photos.
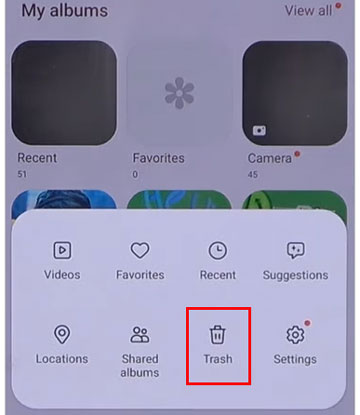
Step 3: Click "Delete" > "Move to Trash". Next, click the "Menu" icon and choose "Trash".
Step 4: Select all the photos, and tap "Delete" twice. Now, all the selected photos have been removed from your Samsung device.
You can manage your Samsung photos on your computer with Samsung Messages Backup. This program allows you to directly preview all your albums and pictures and remove photos from your Samsung phone on your PC. Besides, you can create new albums and move or copy your photos on your computer with a large screen, which will be synced to your Samsung phone simultaneously.
- Enable you to preview your Samsung pictures on a PC.
- Delete unwanted photos from your smartphone on your PC.
- Remove useless videos, music, contacts, documents, apps, and more from Samsung.
- Transfer photos from your Samsung phone to your computer and vice versa.
- Back up and restore your Samsung data in 1 click.
- Support Android 6.0 and upper, including Android 15.
Download Samsung Messages Backup.


Step 1: Connect your Samsung phone to your PC via USB, and install Samsung Messages Backup on the computer.
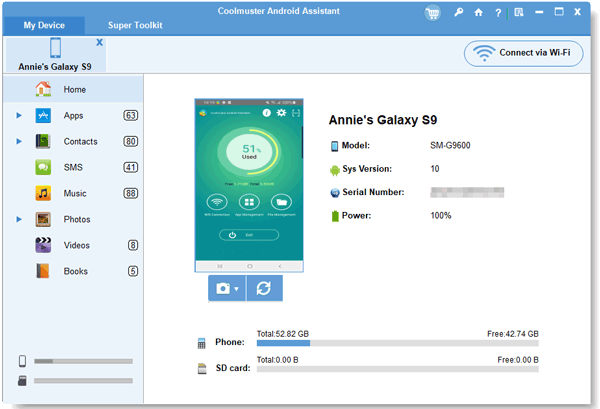
Step 2: Enable the USB debugging mode on Samsung, and the program will recognize your mobile phone immediately.
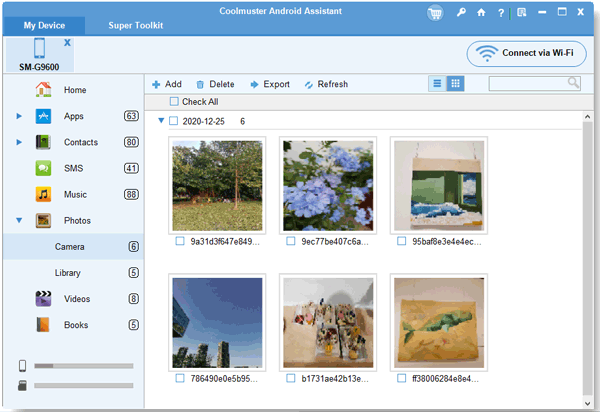
Step 3: Choose "Photos" on the panel, and preview all your Samsung photos. Next, select the pictures that you plan to remove, and click the "Delete" icon on the top menu. Then your selected images will disappear from your Galaxy device.
If you have turned on the "Sync with OneDrive" feature on your Samsung Gallery app, your photos will be backed up to your Microsoft account. In case you fail to delete photos from the Gallery app, you can check your OneDrive account.
Step 1: Please open the Gallery app on your Samsung phone, and navigate to the photos that you want to delete. Then remove them, and empty from "Trash".
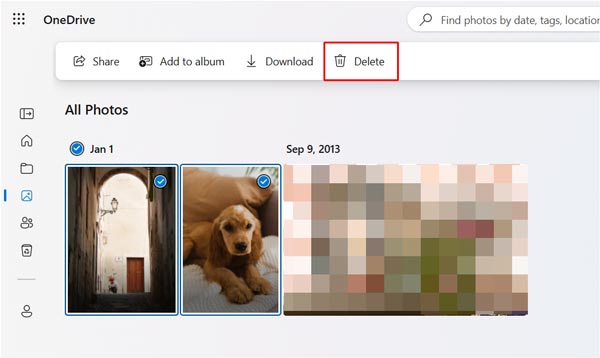
Step 2: Access the web of OneDrive, and log in to the account that you attached to your Samsung phone.
Step 3: Check if your photos are deleted from your OneDrive account. If not, delete them, and empty the trash bin of OneDrive.
What if you permanently delete photos from Samsung S22/S23/S24? Actually, if you want to delete data thoroughly, you need a professional data eraser like Samsung Eraser. This software can erase all the content and personal information at one go, including your photos, and overwrite your deleted data three times. Therefore, no data can be recovered. But please note that it will wipe all your data, so please back up your useful files first.
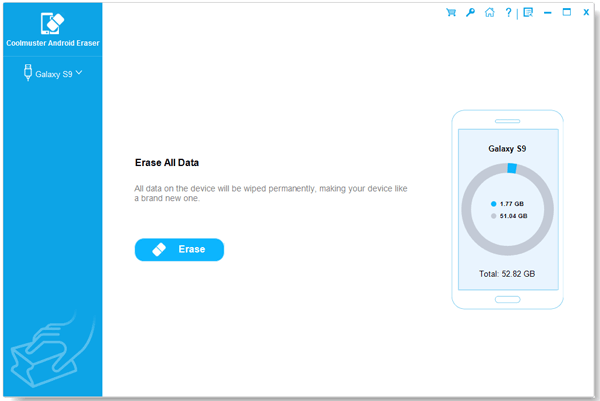
Step 1: Download and install Samsung Eraser on your computer. Then open it on the desktop.
Step 2: Link your Samsung Galaxy phone to the PC with a USB cable, and activate USB debugging on Samsung. Then the connection will be established, and click "Erase".
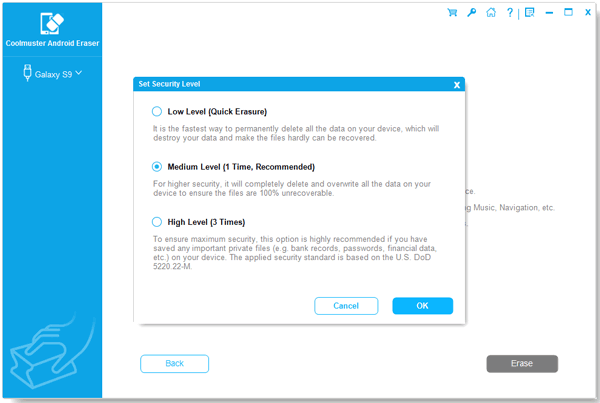
Step 3: Select a level for erasing, then click "OK", and type "delete" to the blank.
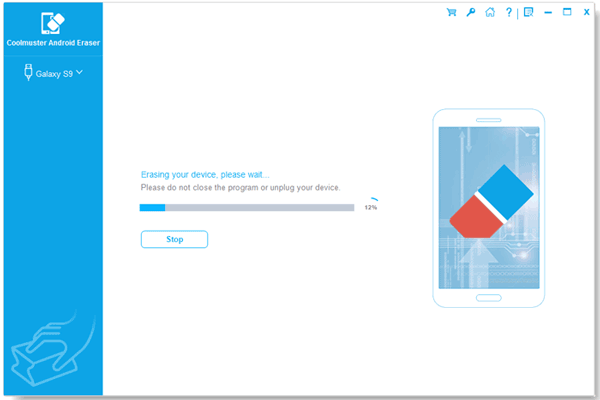
Step 4: Finally, click "Erase" to start the process. All your photos and other data will be removed from your Samsung device.
Q1: Why did deleted photos reappear on my Samsung phone?
Q2: Can my photos be recovered after I delete them from my Samsung phone?
If you just delete your photos from your Samsung albums, you can restore them from Trash within 30 days. If you empty Trash as well, you can use recovery software to recover them. However, recovery becomes difficult if the space occupied by the deleted photos is overwritten by new data. Thus, it depends on the degree of deletion.
These are the 4 methods we recommended for you to delete photos from a Samsung phone. You can remove photos from your phone directly, or manage photos on your PC with Samsung Messages Backup. If you want a permanent deletion, you can choose Samsung Eraser. This tool can overwrite all your data up to three times, including deleted photos.
Related Articles
How to Recover Deleted Photos from SD Card?
How to Delete Backed-up Photos on Google Photos | No Data Loss on Device
How to Transfer Photos from Samsung to iPhone 15? - 4 Tips
How to Recover Photos from Secure Folder on Samsung | Effective Skills
How to Delete Contacts on Android Phone? 5 Smart Methods for You
Will Factory Reset Delete Everything? Easily Reset Different Devices

Sophie Green, Chief Editor of Samsung-messages-backup website, has been focusing on the realm of Android Recovery, Android Transfer (Backup), Android Device Tips, Phone Clean, and Phone Transfer technologies. Recognized contributions on leading platforms attest to her esteemed expertise and reliability.
Copyright © samsung-messages-backup.com All Rights Reserved.


